I was asked a few times to show how I process my images. So here is my (current) workflow which I use as basement. I created it over the last 2 years with many help from other people on AstroBin or tutorials in the internet.
At the bottom of this page, you’ll find my real check list, which I use for all my images – more or less, depending on the object (eg. Cygnus Loop needs star reduction twice or triple).
Note:
This is one way of many to process an image. Many processing steps can be done with other tools and maybe things can be done better than I’ll show here. But I don’t want spend too much time with processing. And I’m very happy with the results of this workflow every time 😉
Software used:
- Pleiades Astrophoto PixInsight 1.8.5
- Adobe Lightroom 6
Video Step-by-step
#1 Batch Preprocessing
#2 Image Crop
#3 Remove tint
#4 Background Extraction & Color Calibration
#5 Histogram
#6 Contrast
#7 Denoise
#8 Reducing Star Size
#9 Sharpness & Saturation
#10 Export
#11 Finish in Lightroom
Result
Check List
 #1 Batch Preprocessing

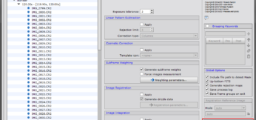
I preprocess my pre-sorted raw images (bias, darks and lights) with the BatchPreprocessing script in PixInsight. Dependent on the object, I use 2x drizzle (especially for small objects).
In this example I don’t use drizzle, so I activate Image Integration in the Batch Preprocessing script.
Read more here.
On the right you see the result of the Batch Preprocessing. I already applied ScreenTransferFunction STF to stretch the image. Otherwise you see just a dark black image with some star points. Actually I don’t know why it has a very strong green tint…
Let’s start with the processing…
#2 Image Crop
First of all I crop the image. Because I want keep the image proportions, I use values at 4:3 ratio:
200px : 150px = 4 : 3
Note: values has to be negative!
If I want a square image or other formats, I use DynamicCrop.

#3 Remove tint
This part contains 4 steps:
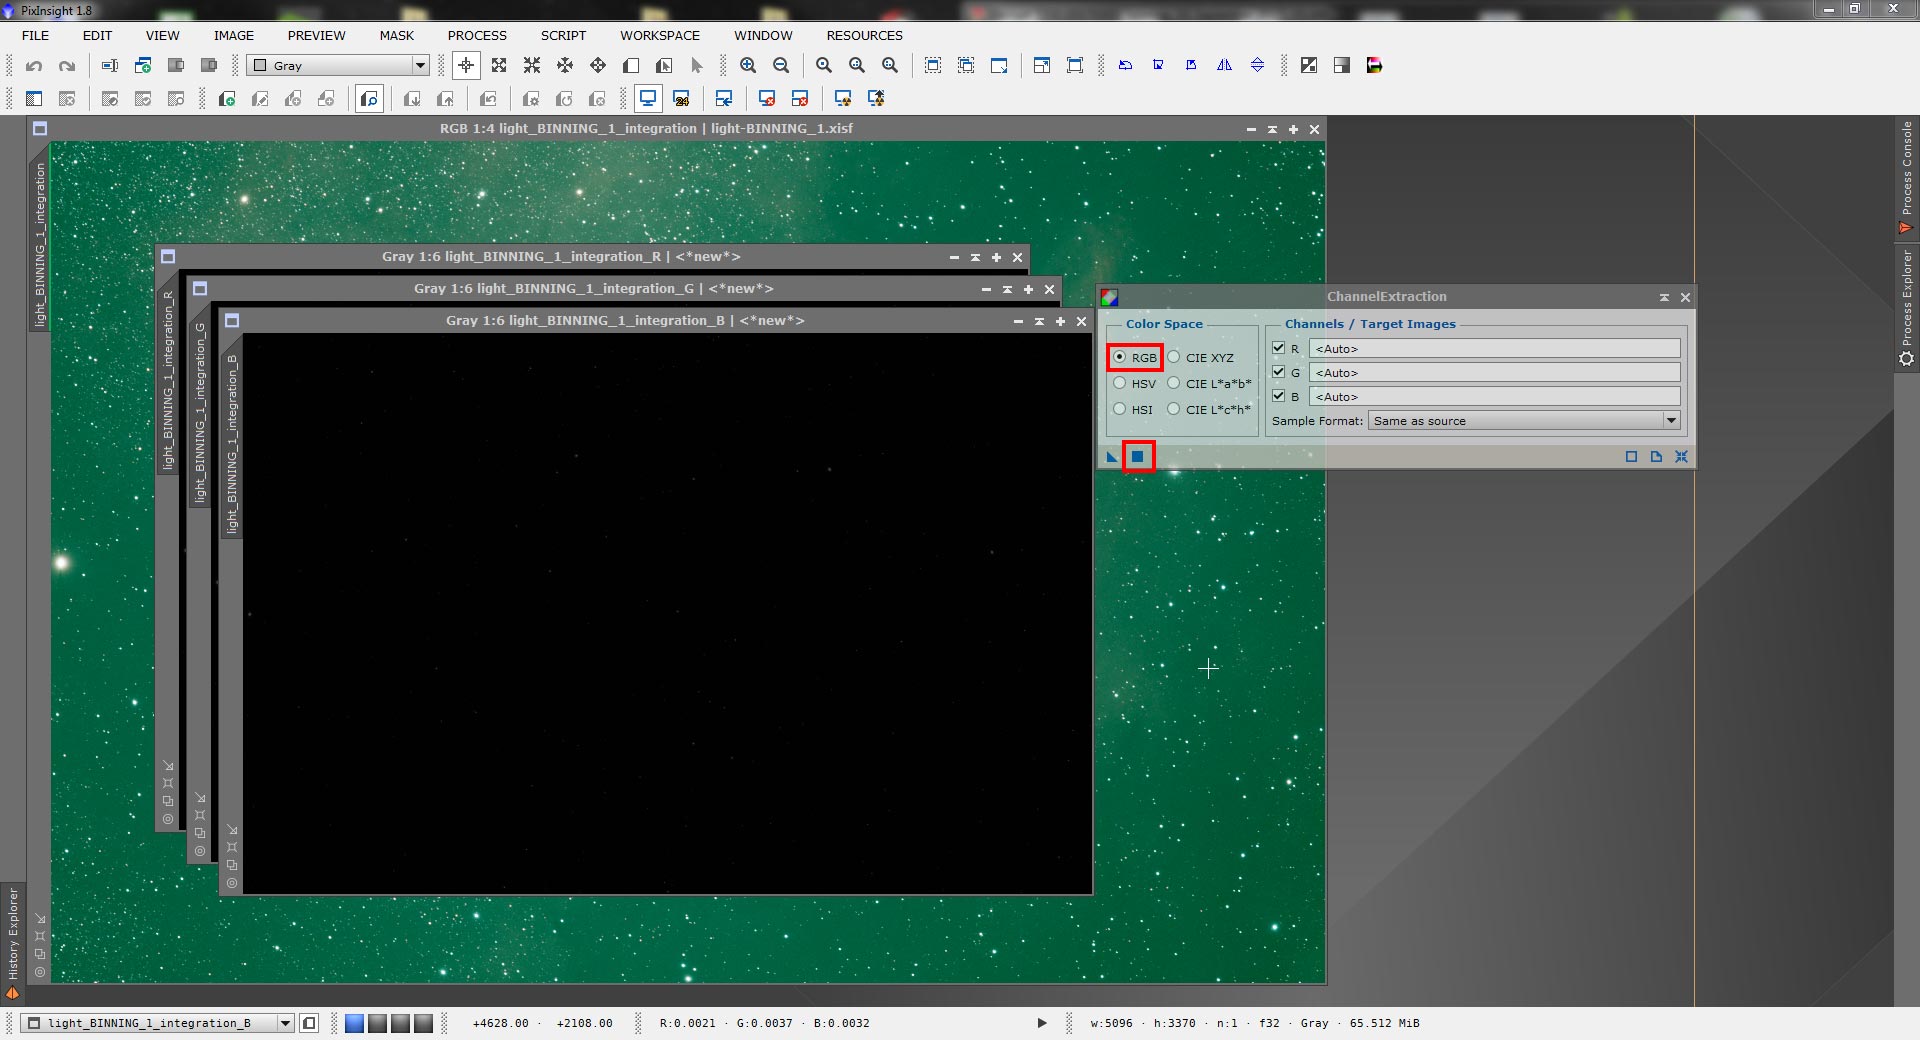
ChannelExtraction
Channel Extraction splits the image into 3 channels. Red, Green and Blue.
Statistics
Statistics is used to find out which channel has the lowest median value, In this example it’s the red channel.
LinearFit
The channel with the lowest median value is used as reference image in LinearFit and applied to the other 2 channels (in my case G and B).
ChannelCombination
Final step of this part is ChannelCombination to combine R,G and B channel again to a RGB image.
Related video: Remove Tint In PixInsight


#4 Background Extraction & Color Calibration
AutomaticBackgroundExtractor / DynamicBackgroundExtractor
To remove background gradients I use Automatic Background Extractor (ABE) or Dynamic Background Extractor (DBE), depending on the result with ABE.
ABE creates on some objects strange dark areas, well visible on M42 Orion Nebula:


In that case DBE is much better to extract the background gradients. It is more time consuming but it is worth to spend the time. There are many good DBE tutorials on YouTube.
The next 3 steps are for calibrating the colors.
BackgroundNeutralization
As reference image I use a small star-less background area which is selected by using a preview mode (Image08_ABE->Preview01).
ColorCalibration
In ColorCalibration I use Preview01 as background reference and I create a new preview mode over the main object (Preview02) which I use as white reference. I didn’t adjust any other parameters here.
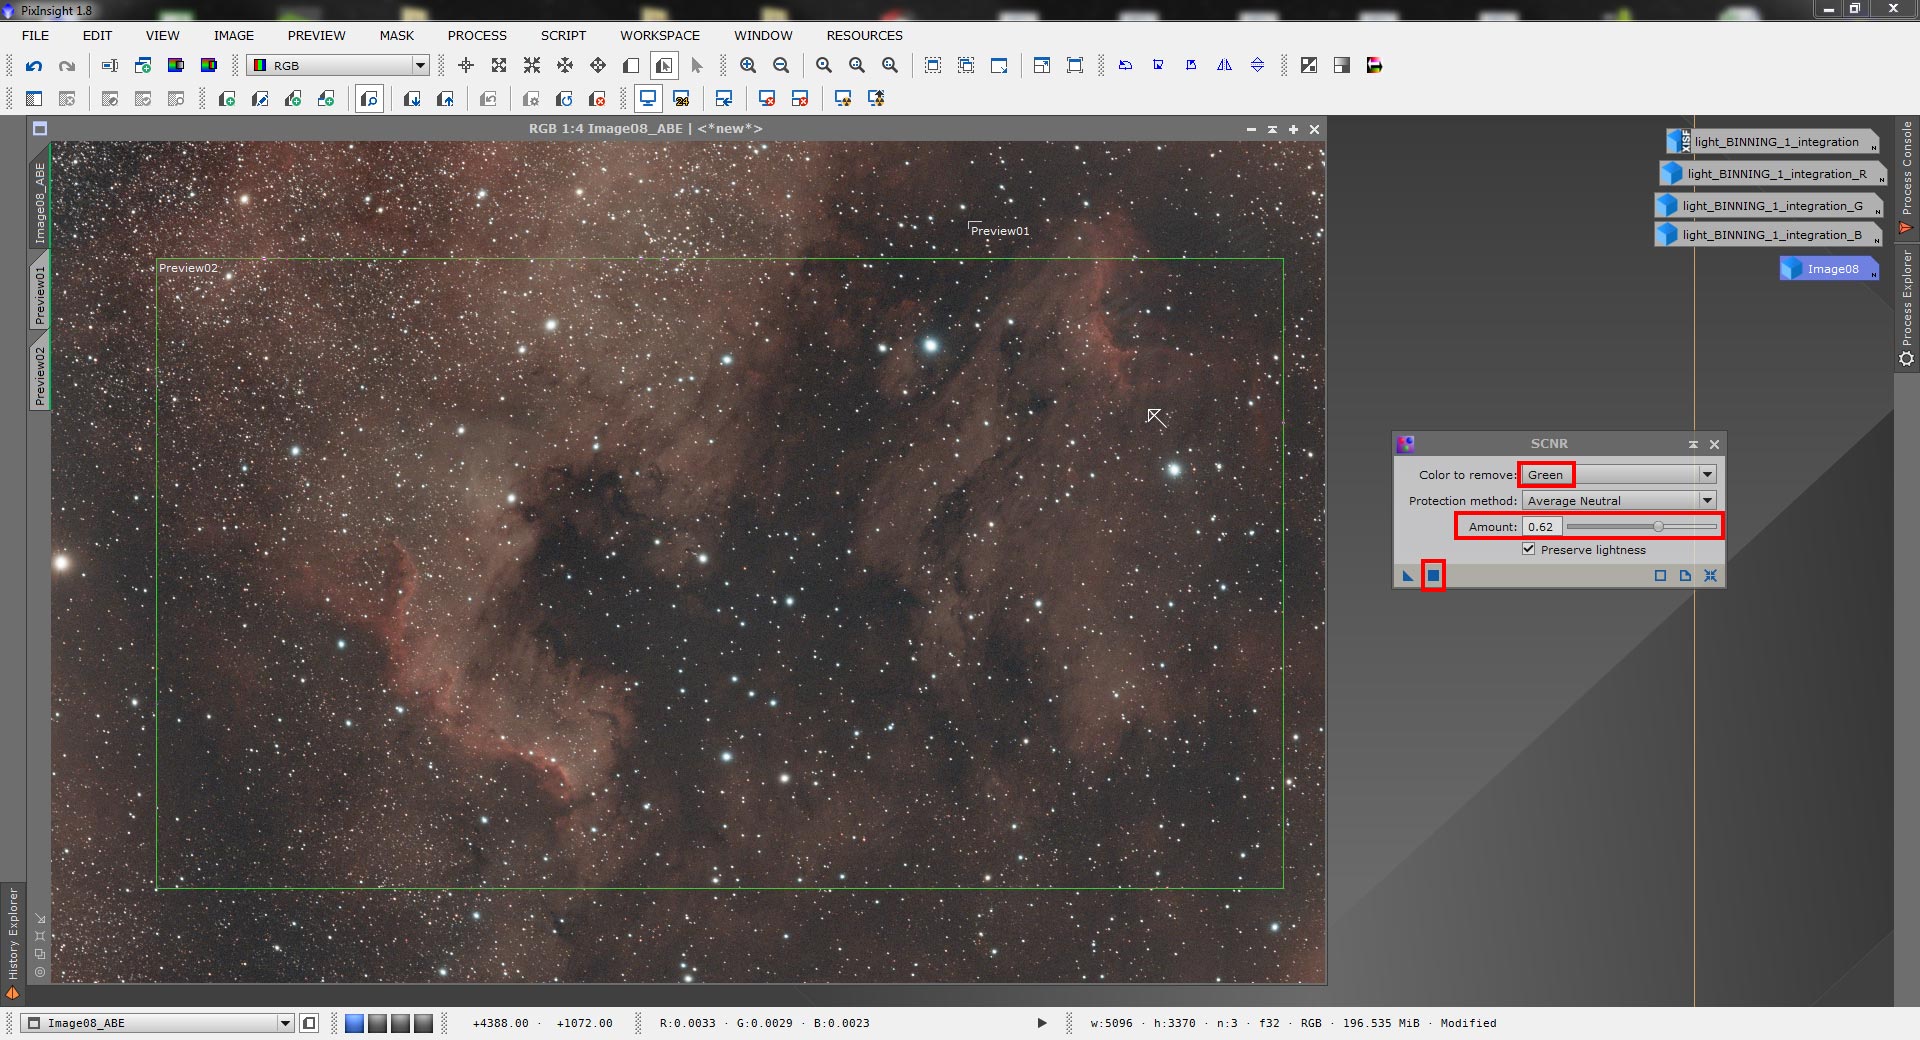
SCNR
Last but not least I remove slightly green noisy pixels (0.60-0.75) with a tool called SCNR (Subtractive Chromatic Noise Reduction). Read more about SCNR


#5 Histogram
All processes until now are applied to the unstretched raw image, temporary stretched with STF.
The unstretched histogram shows a very thin curve on the left side. We want wo stretch that thin curve and move it a little bit towards right.
Process – IntensityTransformations – HistogramTransformation
- F12 removes the ScreenTransferFunction STF
- Process – IntensiyTransformations – HistogramTransformation
- Adjust Shadows, but keep clipping value below 1000
- Adjust midtones to stretch the histogram curve
If needed, I adjust the midtones from single channels to reach best possible white balance.


#6 Contrast
Curves Transformation
Here I use 2 points in RGB/K mode for slight contrast enhancement. One for the shadows in the left bottom corner (I drag the point a little bit downwards) and a second point in the center of the curve (I drag the point a bit towards left).
Not too much, final contrast can be adjusted later in Lightroom or of course also in PixInsight.

#7 Denoise
As denoise tool I use TGV Denoise. In the past I used ACDNR. Until I found a comparison of different denoise algorithms. And TGVDenoise performed best.
Because I want only denoise the dark regions I use a mask.
4 steps to denoise the image:
- First I create a CIE L component mask
- Next the CIE L component mask is beeing inverted
- Then the mask is applied
- Finally I use TGVDenoise with strength greater than 8.0 and smoothness greater than 5.0


#8 Reducing Star Size
This is a important step to give the main object more presence.
- With StarMask I create a mask, usually with the default parameters.
Only if I process a drizzled image I use Scale: 6 - MorphologicalTransformation reduces the star size. Here I play with the amount value.
- If needed, I repeat this 2 steps to reduce the stars more and more…
Related video: Reduce Star Size In PixInsight


#9 Sharpness & Saturation
Final steps in PixInsight…
Again I use a mask: RangeSelection mask.
Alternative: If the object contains only one color, ColorMask is a very good alternative (Script – Utilities – ColorMask).
Steps
- Create RangeSelection mask
- Adjust sharpness with UnsharpMask
- Saturation anhancement with CurvesTransformation
Sometimes I invert the RangeSelection mask at the end, to de-saturate only the background (again with CurvesTransformations).


#10 Export
Last step in PixInsight is export the final image as 16 bit TIFF, without associated alpha channel.
If I wouldn’t use Lightroom for the finish, I would now enhance the contrast in PixInsight with CurvesTransformations (2 points for contrast).

#11 Finish in Lightroom
As last step I import the 16 bit TIFF in Lightroom. If needed I crop the image again. Then I start to Develop the image in the following order:
Section: Lens Correction / Detail
Remove Chromatic Aberration, Color Noise Reduction and Luminance Noise Reduction
Section: Basic
Exposure, Highlights, Shadows, Blacks, Clarity, Vibrance and Saturation
Section: Tone Curve
Darks and Shadows
Attention: clipping!
Take care to the histogram. If the little triangles on the top left and right corner in the Histogram changes the color from grey to any other color, it’s clipping.


Done 🙂
The result of this quick processing. On my original NGC7000 image I used additionally HSL-Hue in Lightroom to adjust red/yellow colors.
So, I hope this was helpful… definitely it was a lot of work to create this tutorial 😉

Check list
1. Crop
2. ChannelExtraction – LinearFit – ChannelCombination (Global Apply)
3. AutomaticBackgroundExtractor (2x ?) / (Dynamic Background Extractor)
4. (BackgroundNeutralization) – ColorCalibration
5. SCNR to green 0.60-0.75
6. Histogram
7. If needed: Curves with 2 points! (enhance contrast)
8. Extract CIE L component mask (inverted) – TGVDenoise
9. StarMask (Drizzle: scale 6 for larger stars) – MorphologicalTransformation (2x ?)
10. MaskGeneration (Range) – UnsharpMask – (LocalHistogramEqualization) – CurvesTransformation
11. if needed: without any mask – CuvesTransformation – Saturation
12. if needed: again StarMask – MorphologicalTransformation
13. if needed: ColorMask – CurvesTransformation (R/G/B, RGB, Ciel, Sat.)


12 comments
Wow, very helpful. Thanks a lot for your effort.
I have to a lot to learn…
You’re welcome 🙂
Großartig und vorallem verständlich! Danke für die Mühe, Karol!
Gruß Jan
Bitte schön. Wenn doch was unklar sein sollte, einfach nachfragen. CS, Karol
Great job. Well done!
Thanks.
Thank you so much for making this turtorial! Your work is so inspiring, and you sharing your process is greatly appreciated! Thank you thank you thank you!
Glad I could help. Thanks for your comment 🙂
Thank you very much for your tutorial! I use a similar setup as you, but strugle with postprocessing. I can use Deep sky stacker and Lightroom quite well, but I’m not very satisfied with results. From Startools I didn’t get a good photography. Is Pixinsight really worth the price? Last it too long to learn the basics of this program?
I also started with DSS but then switched to PI. I never regret the purchase of PI. It is worth the price. But it has a steep learning curve especially during the first usage. As far I remember they offer a trial version. Do you have tested it?
how much time did you have to integrate? and what camera settings did you use?
great tutorial!! thanks for taking the time to do this!
Hi and sorry for my late answer. I generally integrate for about 2-4 hours, depending on the object. My DSLR settings are: manual and bulk mode (of course), 1 to 3 minutes exposure, f/5.6 with my 400mm lens and ISO1600. Hope it helps 🙂
Clear Skies
Karol