Drizzle was originally developed for the NASA’s Hubble Deep Field observations. It provides a flexible and efficient way of combining dithered data, preserves photometric and astrometric accuracy, optimal signal-to-noise ratio and approach the best resolution that can be reached with linear reconstruction. (from “A method for the Linear Reconstruction of Undersampled Images” by A. S. Fruchter and R. N. Hook)

The following settings are for color sensors like in my Canon EOS 70D, using the Bayer matrix filter (RGGB)! Select the proper settings for your camera sensor type!
- To simplify the process I use WeightedBatchPreprocessingScript to generate calibrated, debayered and registered images. These steps also can be done manually.
1 – Weighted Batch Preprocessing
Menu: SCRIPT – Batch Processing – WeightedBatchPreprocessing
1.1 – Add Bias, dark, flat and light frames to the WBPP script and check “Generate drizzle data” in Image Registration section. Select “Auto-detect reference frame” and the Output Directory:

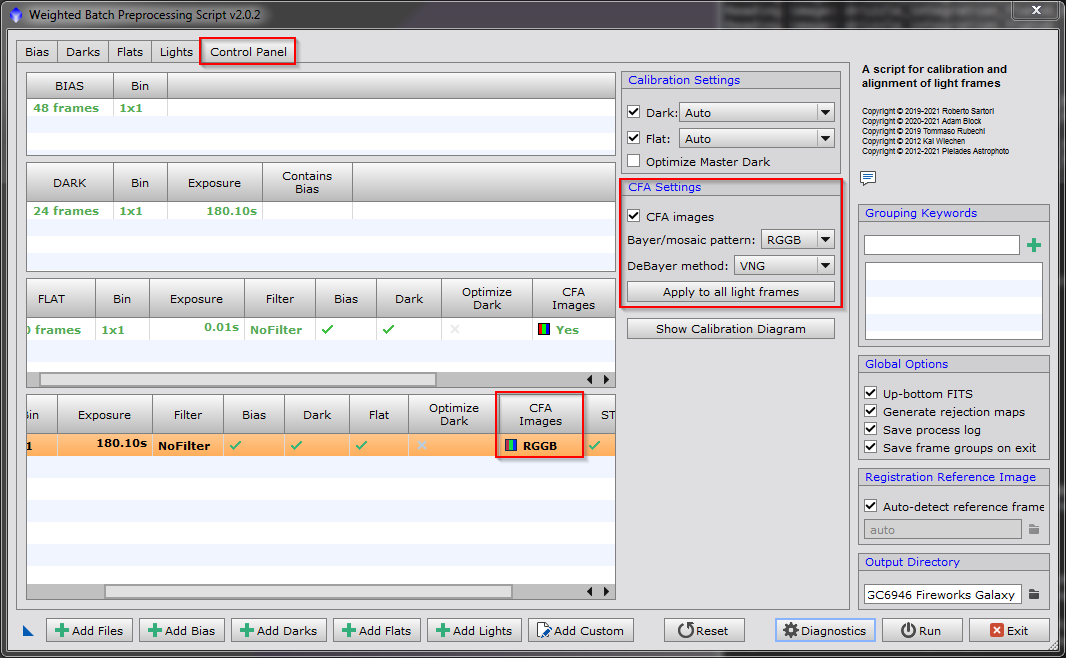
1.2 – In Control Panel tab activate both checkboxes in CFA Settings and apply it to all flat frames (see here why “Separate CFA flat scaling factors” should be checked):

1.3 – Check “CFA Images” for the lights and apply it to all light frames:
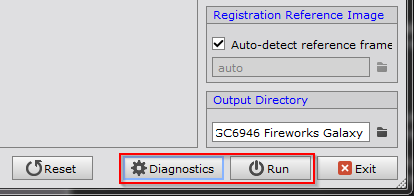
1.4 – Check the settings with “Diagnostics” and start the script with “Run”:
2 – Image Integration
Menu: PROCESS – ImageIntegration – ImageIntegration
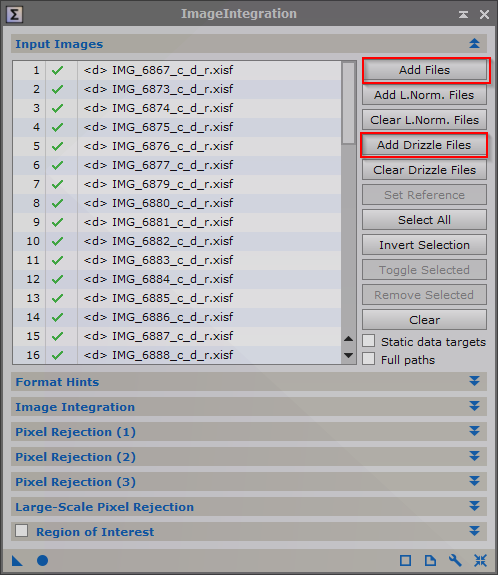
2.1 – Load all registered lights, located in the output directorys subfolder /calibrated/light/debayered into the ImageIntegration process. Then load all drizzle files, also located in the output directorys subfolder /calibrated/light/debayered:
2.2 – Ensure that “Generate drizzle data” is checked in Image Integration section. In this step the drizzle files are modified, so if you want to keep them for later use make a backup now. But I never needed that 😉
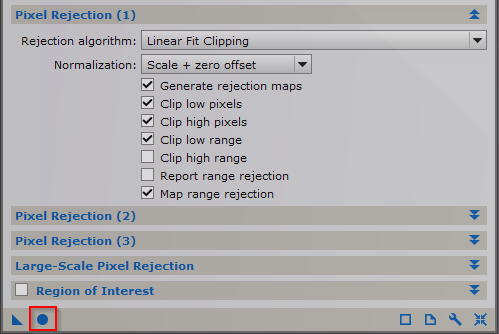
Additional I use LinearFit Clipping as pixel rejection algorithm to create also an un-drizzled version:

2.3 – Start the image integration by clicking on the circle:
3 – Drizzle Integration
Menu: PROCESS – ImageIntegration – DrizzleIntegration
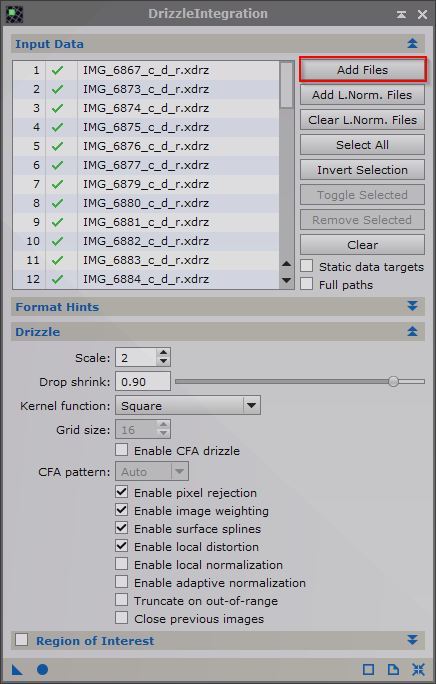
3.1 – Add all drizzle files located in the output directorys subfolder /registered/NoFilter
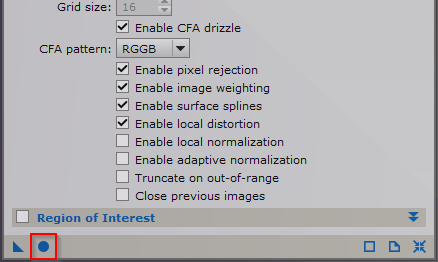
3.2 – The following parameter has a significant effect to the result: “Enable CFA drizzle”
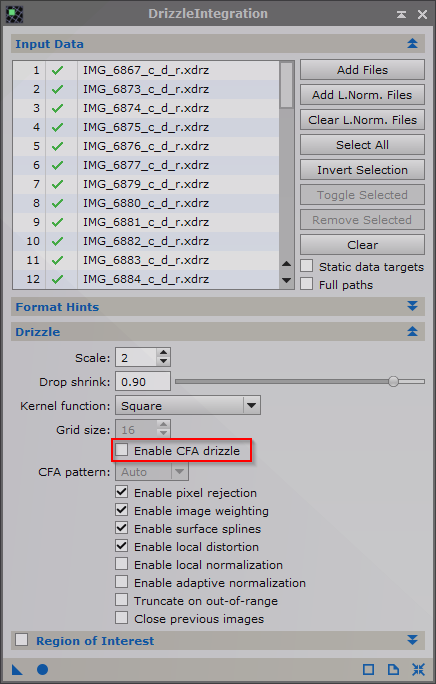
If unchecked, the colors in the drizzled result will match the colors from the normal integration very well.
If checked, the colors looks different but the color noise is much better and overall the objects look smoother.
See here all 3 versions:
- Left: normal integration
- Center: drizzle integration, “Enable CFA drizzle” checked
- Right: drizzle integration, “Enable CFA drizzle” unchecked

The color of the left and right version are almost the same, whereas the center version is clearly different than the others. But at higher resolution it becomes clear what I meant with “smoother”:

So its up to you if you check or uncheck “Enable CFA drizzle” during drizzle integration.
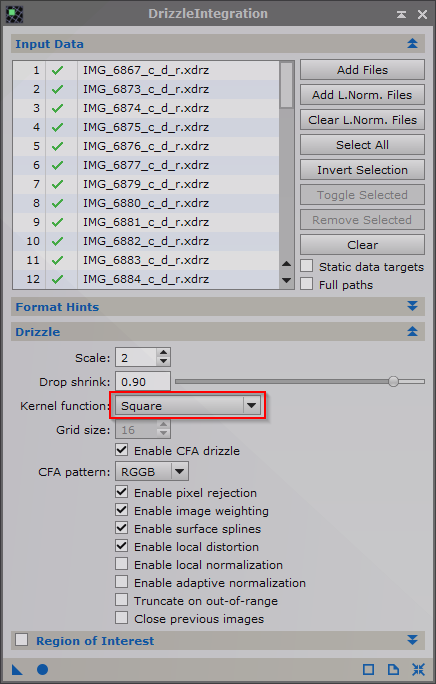
3.3 – Usually I use “Square” for Kernel function since my data are surely not on a high end level 😉 .
“Gaussian” requires much more and better dithered data than the “Square” function, but can also be used in this step. It’s up to you 😉
3.4 – Finally start the drizzle integration by clicking on the circle:
The result will be an image at double width and height (4 x larger image), ready for processing:
| Normal integration (left): | 5196 x 3470 pixel |
| Drizzle integration (right): | 10392 x 6940 pixel |

- Drizzle 2 x = 4 x larger image
Drizzle 3 x = 9 x larger image
Drizzle 4 x = 16 x larger image (…only with a super-computer 😉 )
This are the final results of the 2x drizzled Fireworks and the Vacuum Cleaner Galaxies, very small objects for the Canon EF400mm lens, but possible if drizzled: