 A review of Stellarium has long been overdue… since I use it to plan all my astrophotography sessions.
Stellarium is a rich feautered planetarium app with a very realistic sky, available for Windows, MacOS or Linux and it’s free!
I use it frequently for searching new objects for photography. It’s fun!
If you want use Stellarium to plan your sessions you have to define a few basic settings.
Location
 Add your location first (Shortcut: F6).
Set your place by selecting it from the list or, if your place is not available, simply enter your coordinates, altitude, name/city and add it to the list.

Find your coordinates quickly with Google Maps. Just click on the map on your place and follow the coordinates listed in the little box at the bottom on Google Maps. You’ll find the coordinates in the left info box.


Landscape
 To make all more realistic simply add a landscape similar to your place (Shortcut: F4, Tab “Landscape”).
You can also add your own landscape if you’ve a 360° image of your backyard but I never tried it…

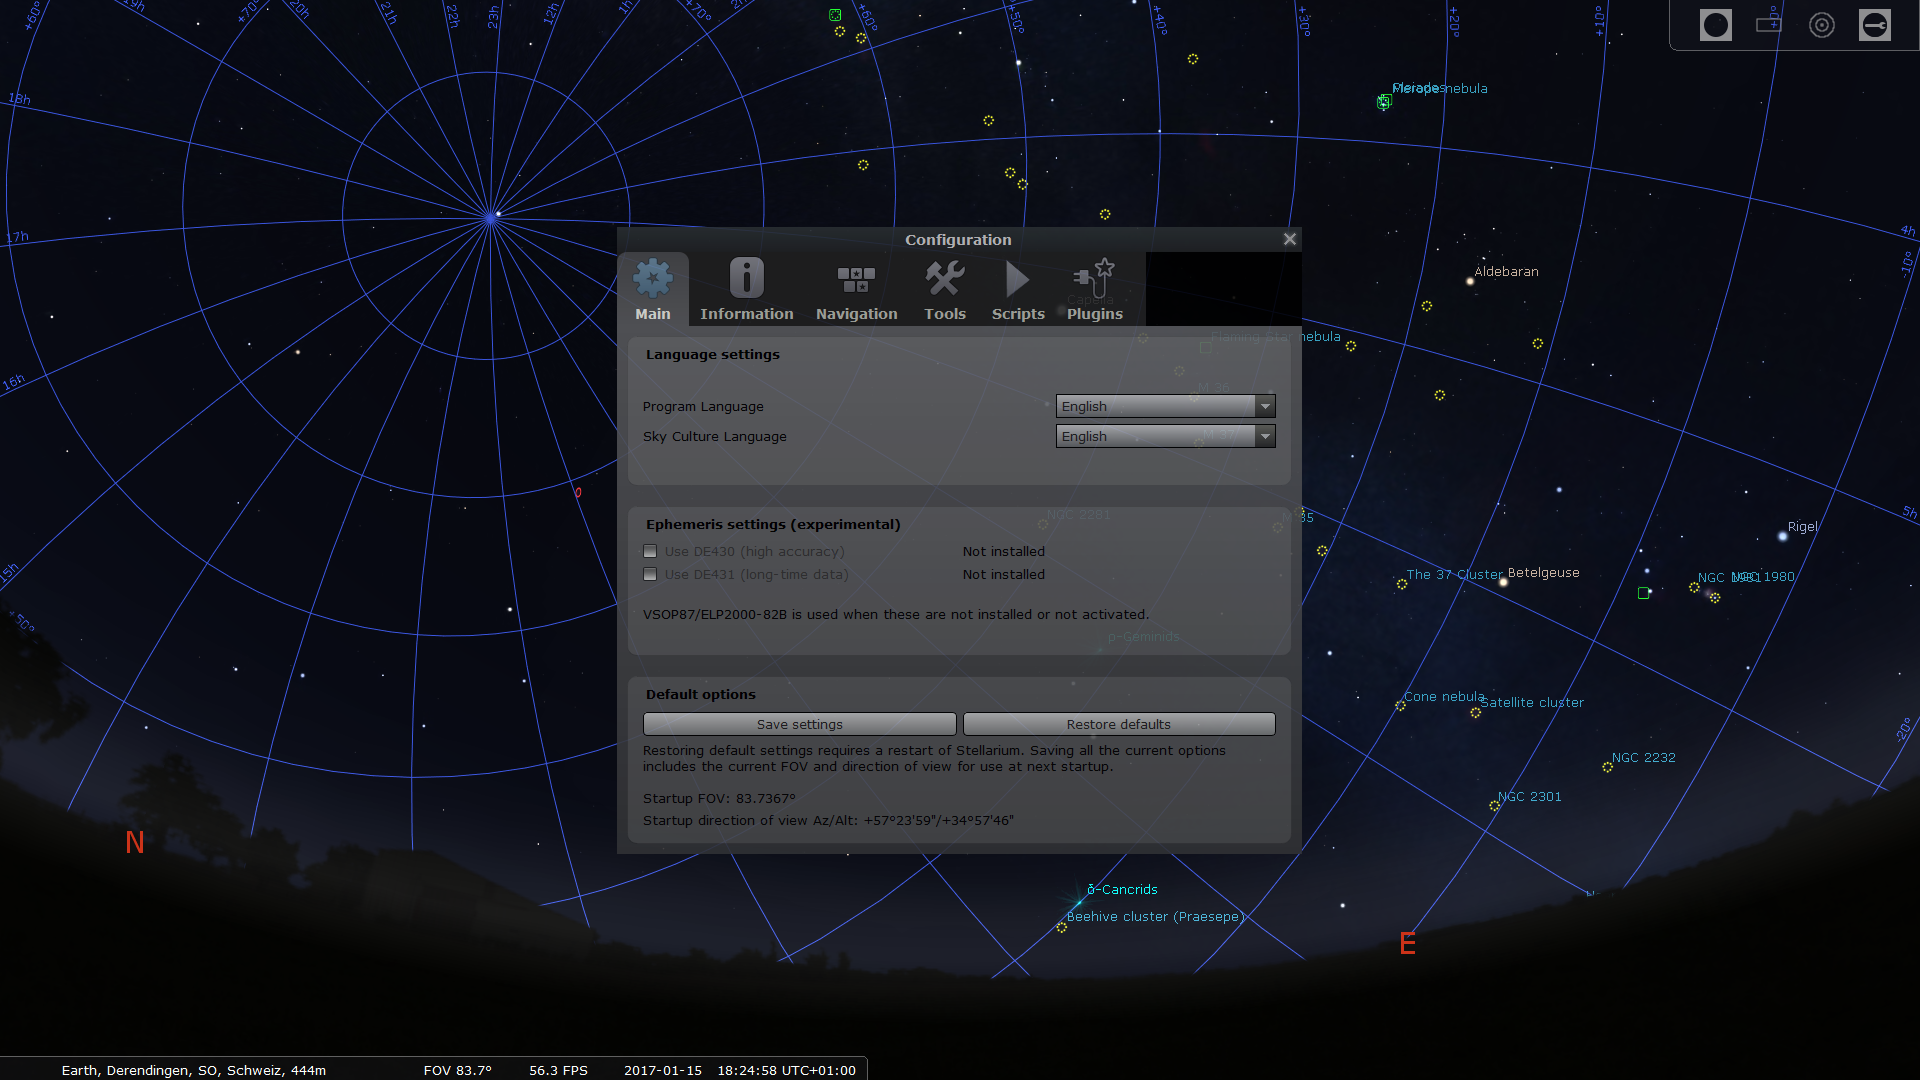
Always Save Your Settings
 Don’t forget to save always your settings (configuration window – Save settings) before you close Stellarium. The current field of view will also be saved so if you restart Stellarium you’ll have always the same view.
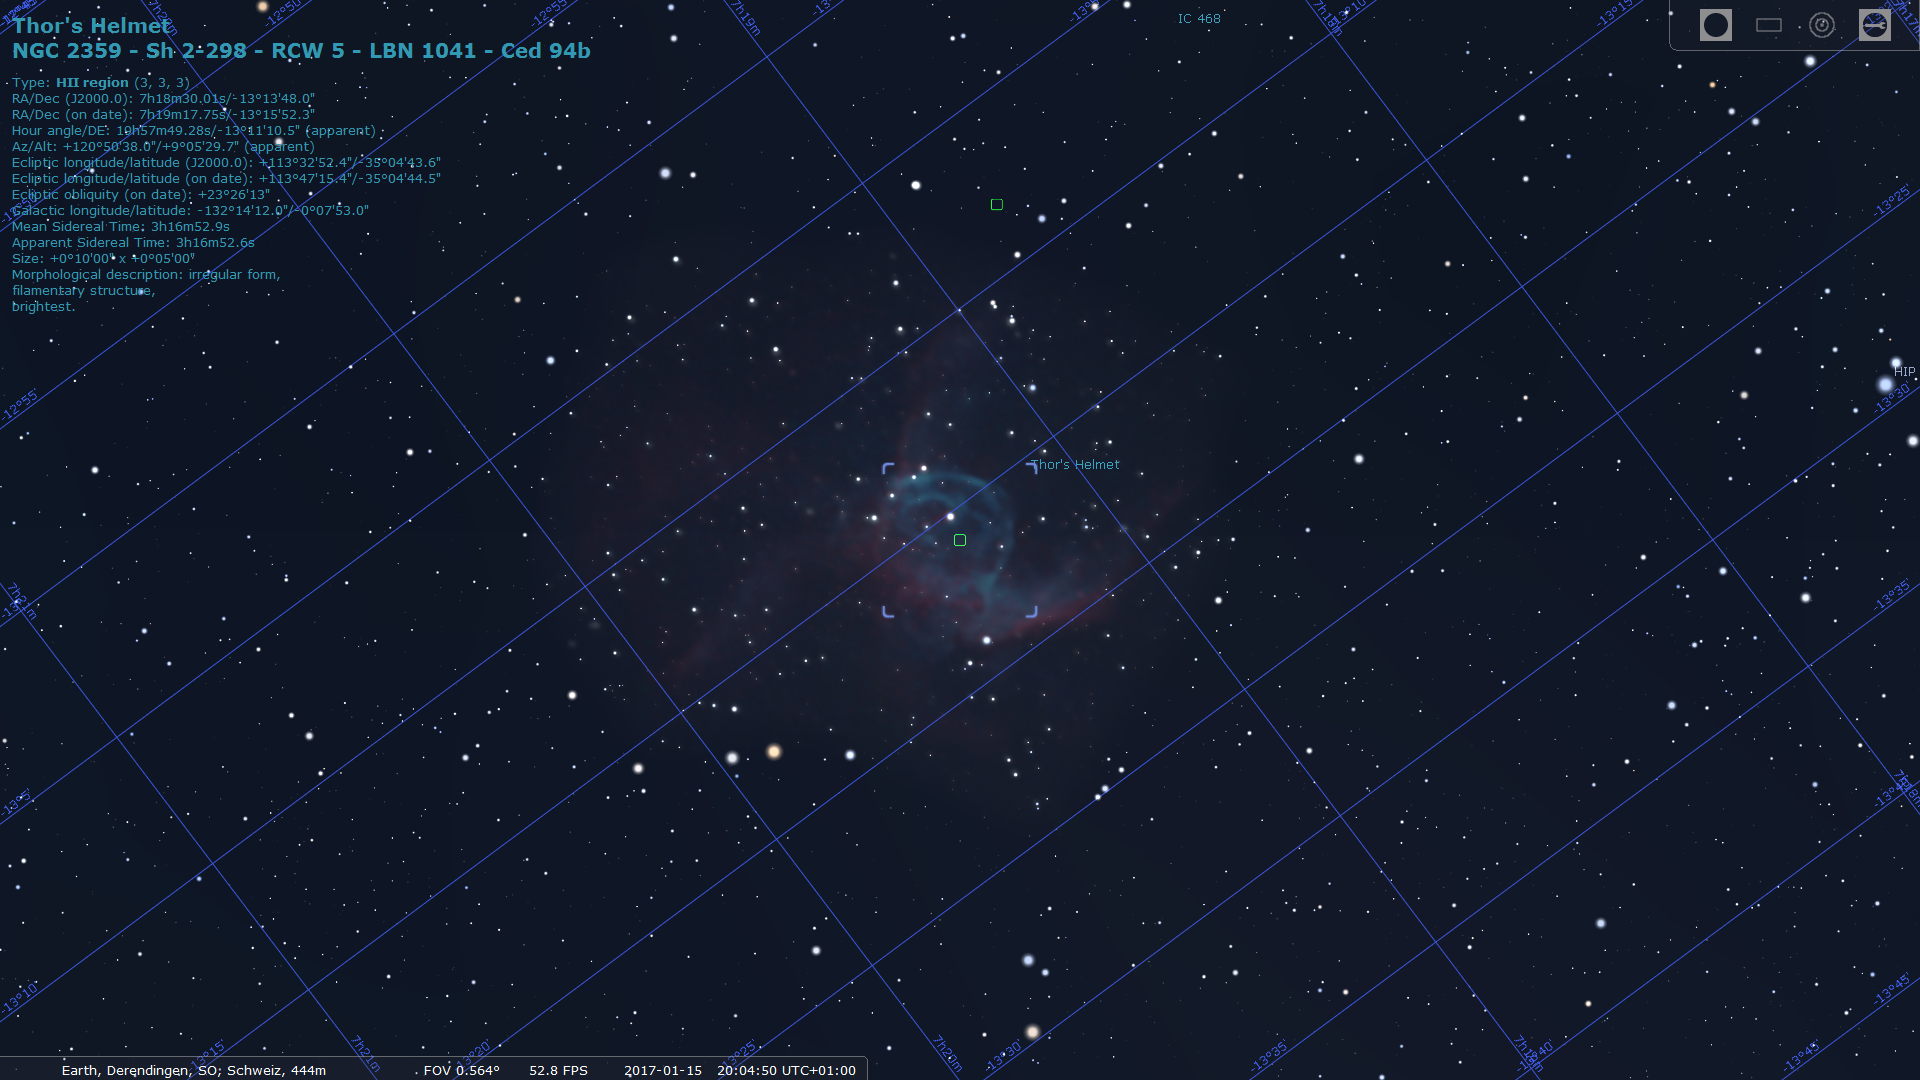
Deep Sky Objects Preview
Many deep sky objects are implemented visually very nice and offering detailed information like size, magnitude or distance.

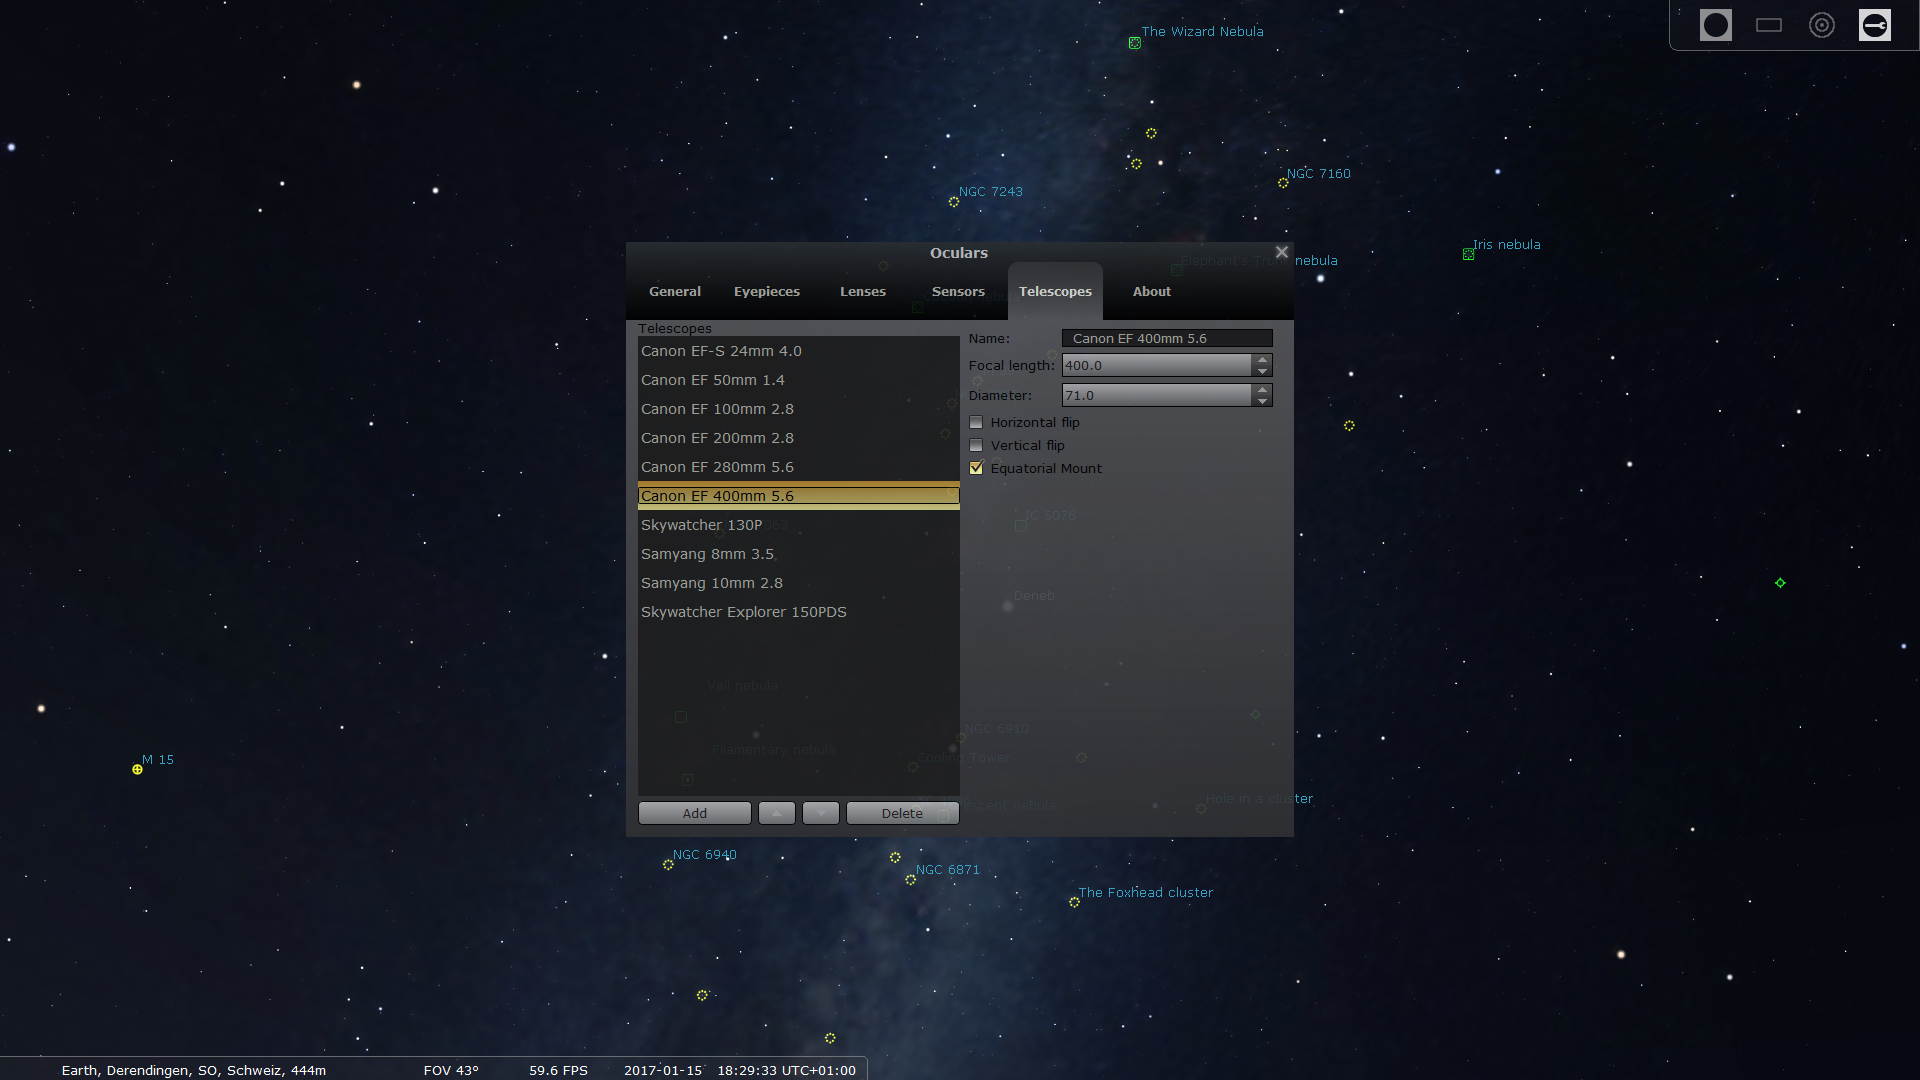
Equipment Simulation
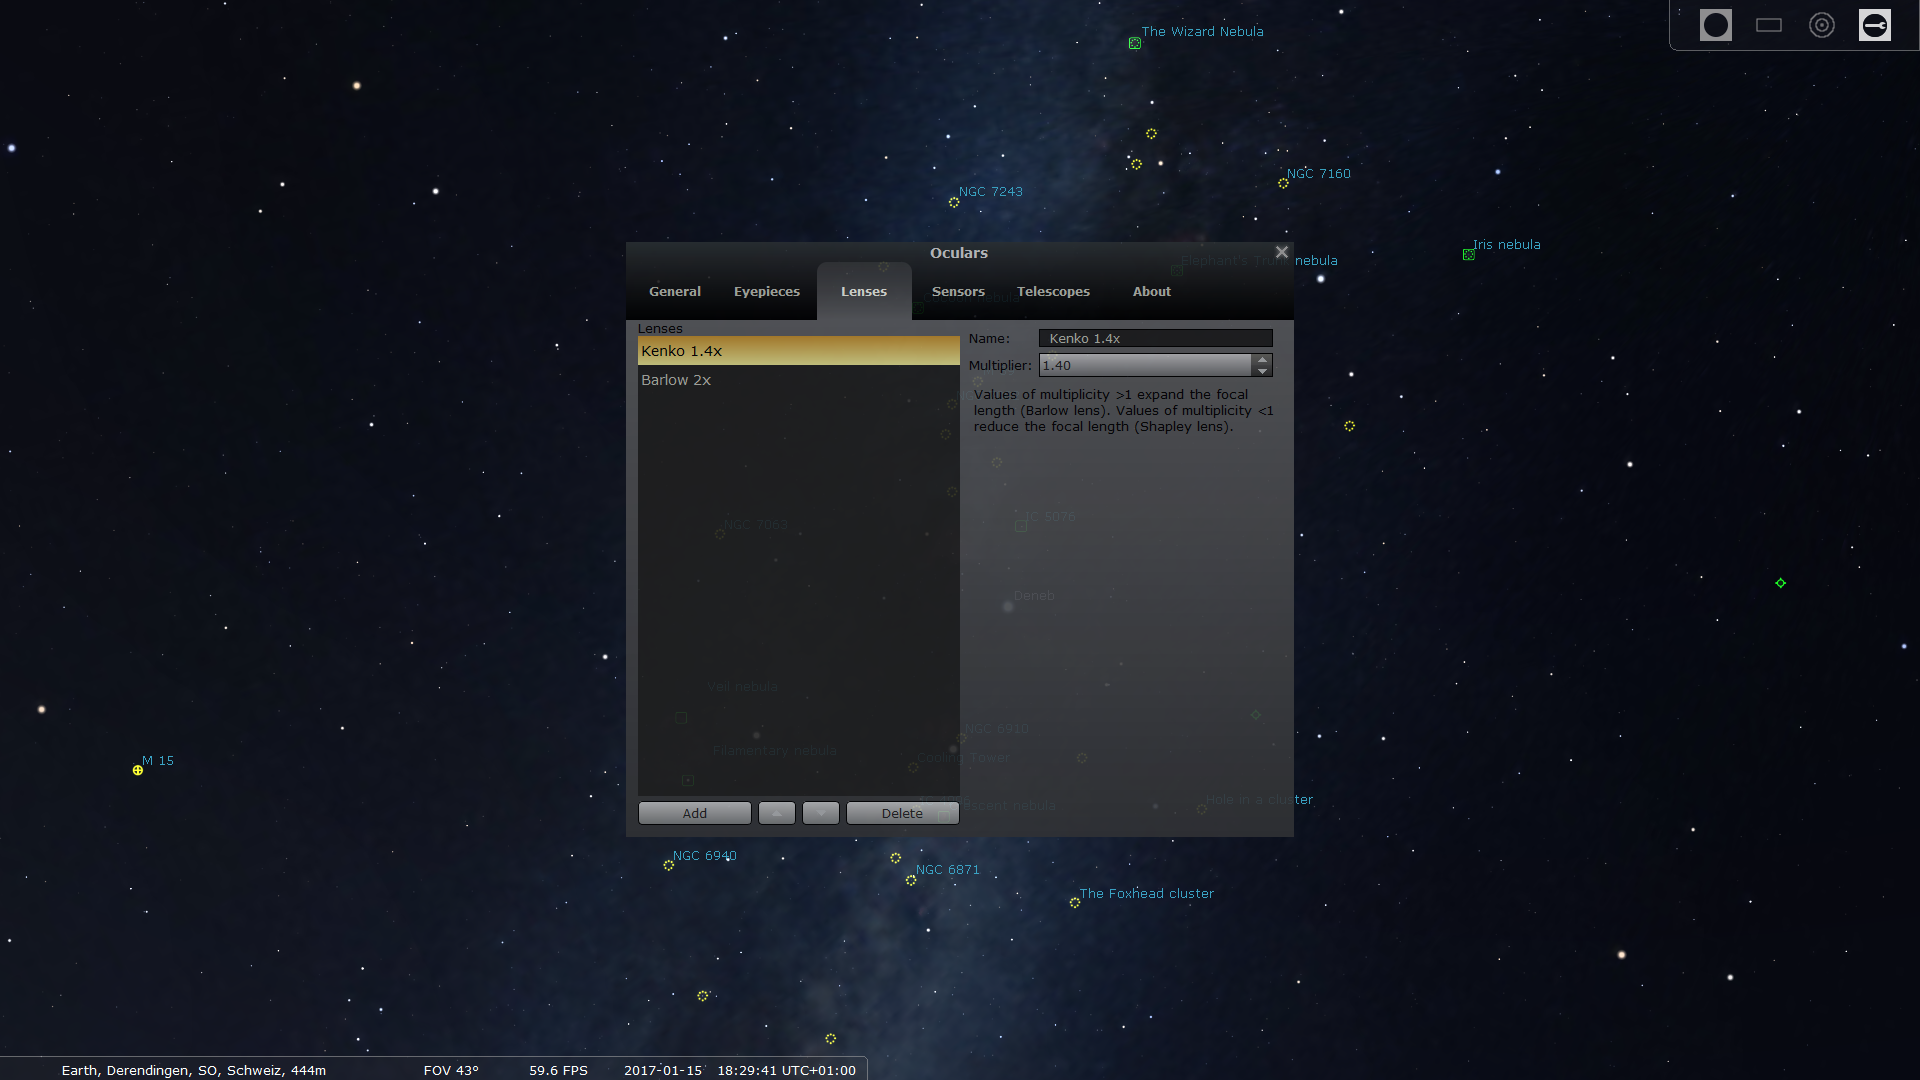
![]() Add your equipment for simulations (top right corner icon). Specify all your telescopes, DSLRs and lenses.
Add your equipment for simulations (top right corner icon). Specify all your telescopes, DSLRs and lenses.
I also add equipment I plan to buy to see how the pictures would look with it.
Important: Add your DSLR lenses to telescope section! Otherwise you’ll not be able to select them in the simulation.
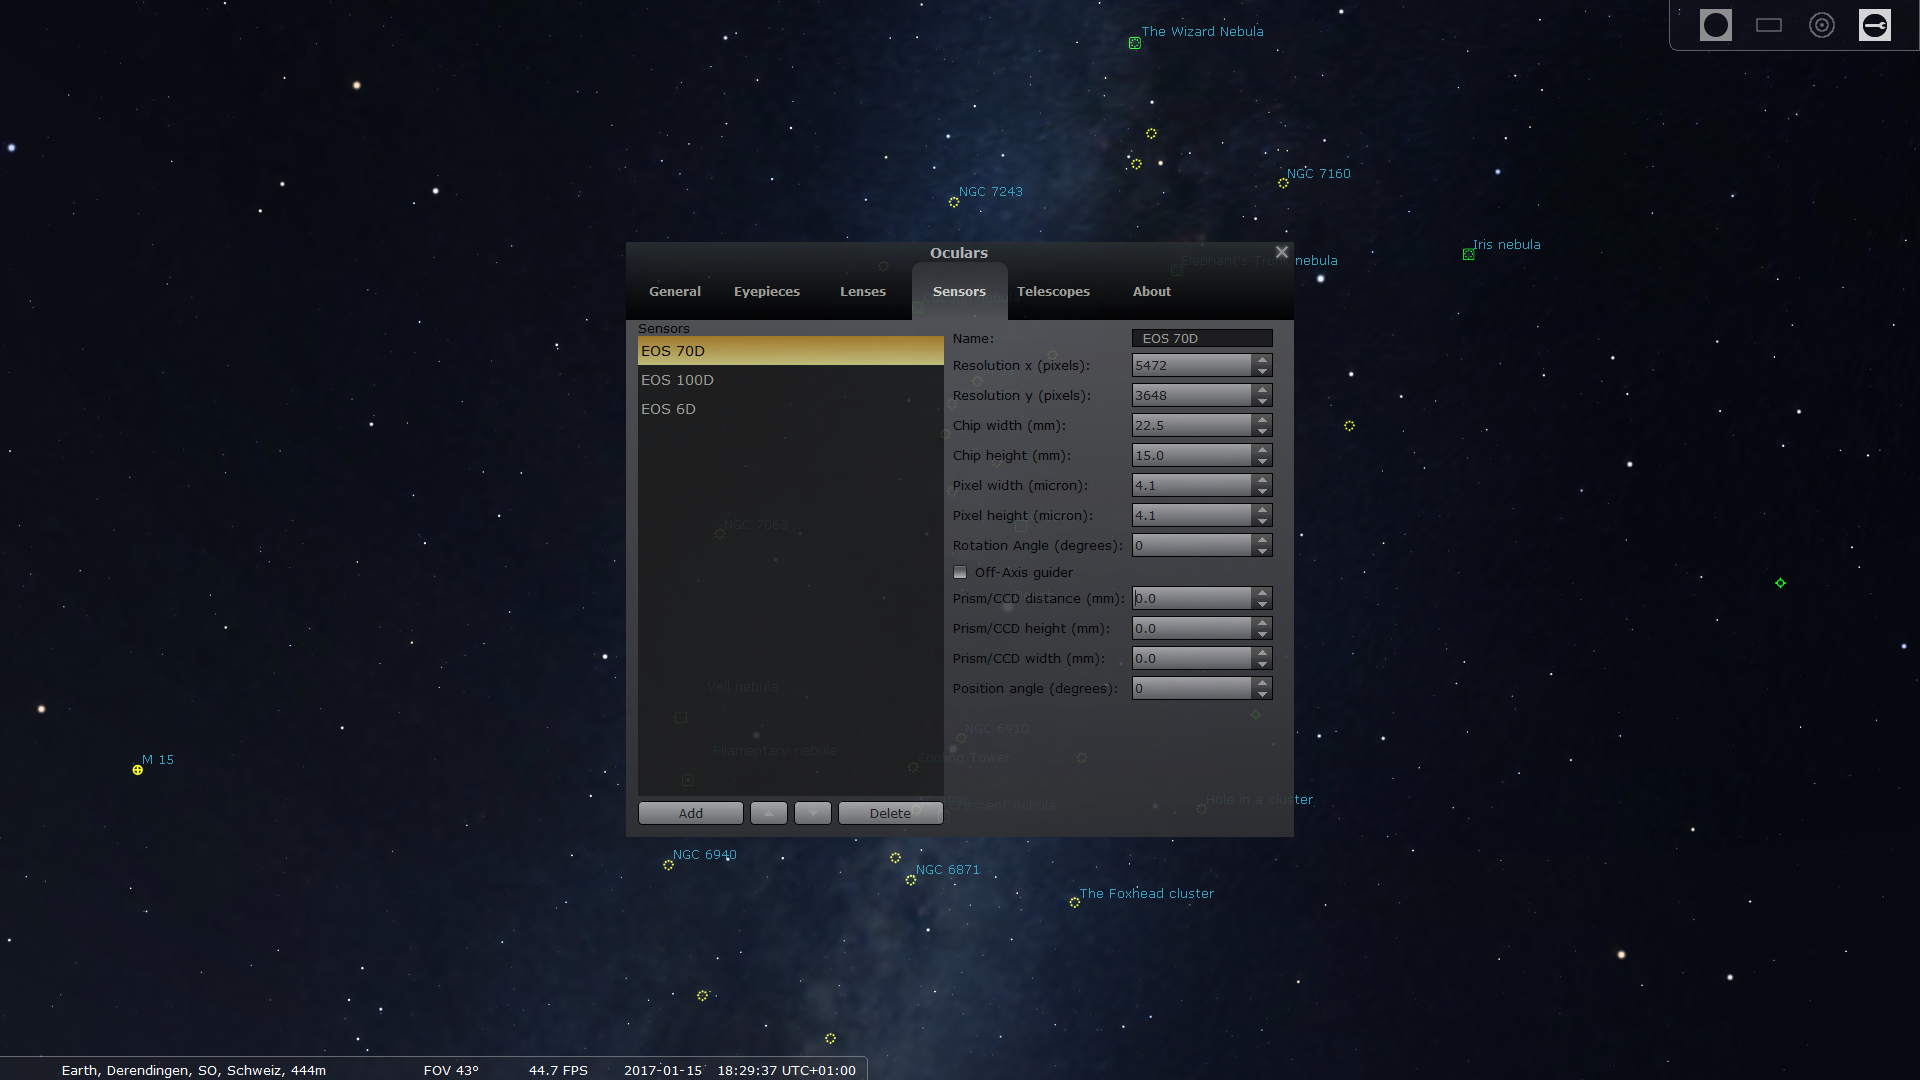
Detailed technical information about your equipment can be found on the net. Here are two pages with specifications of various camera models.
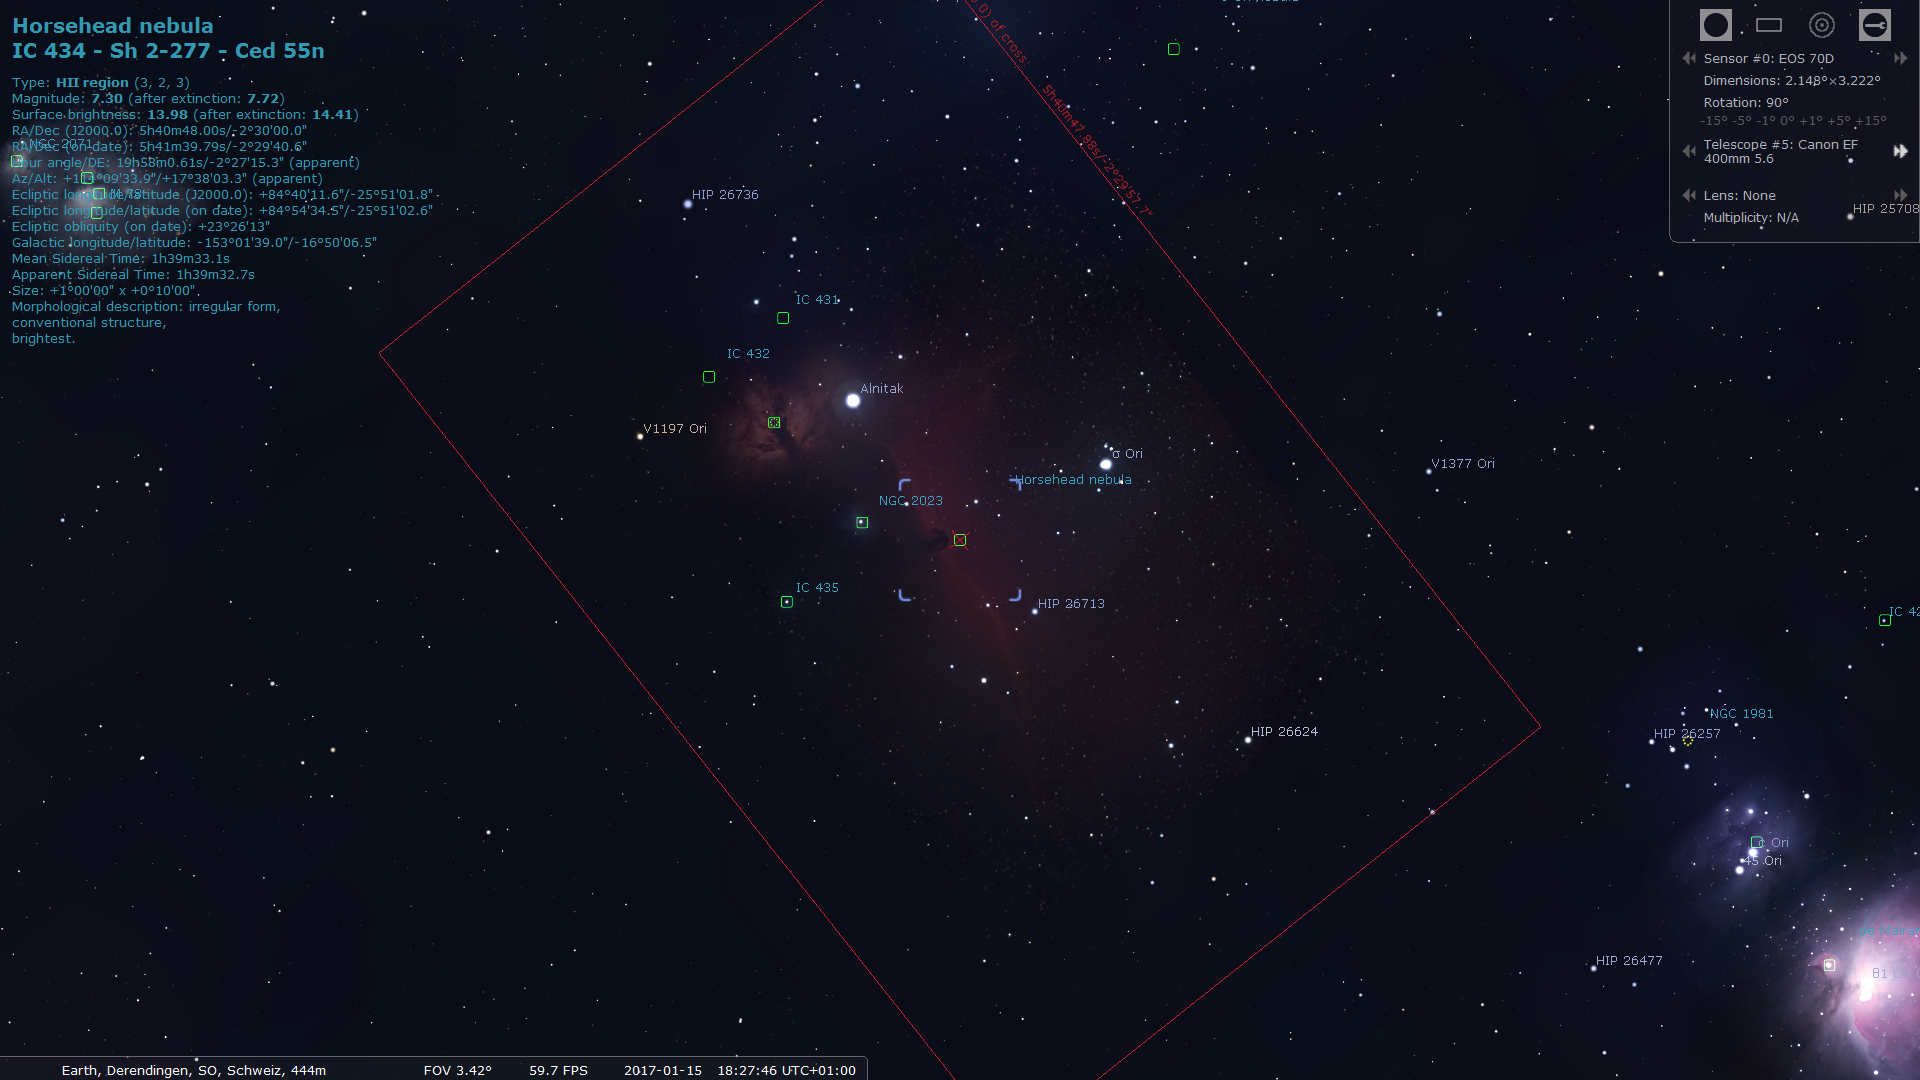
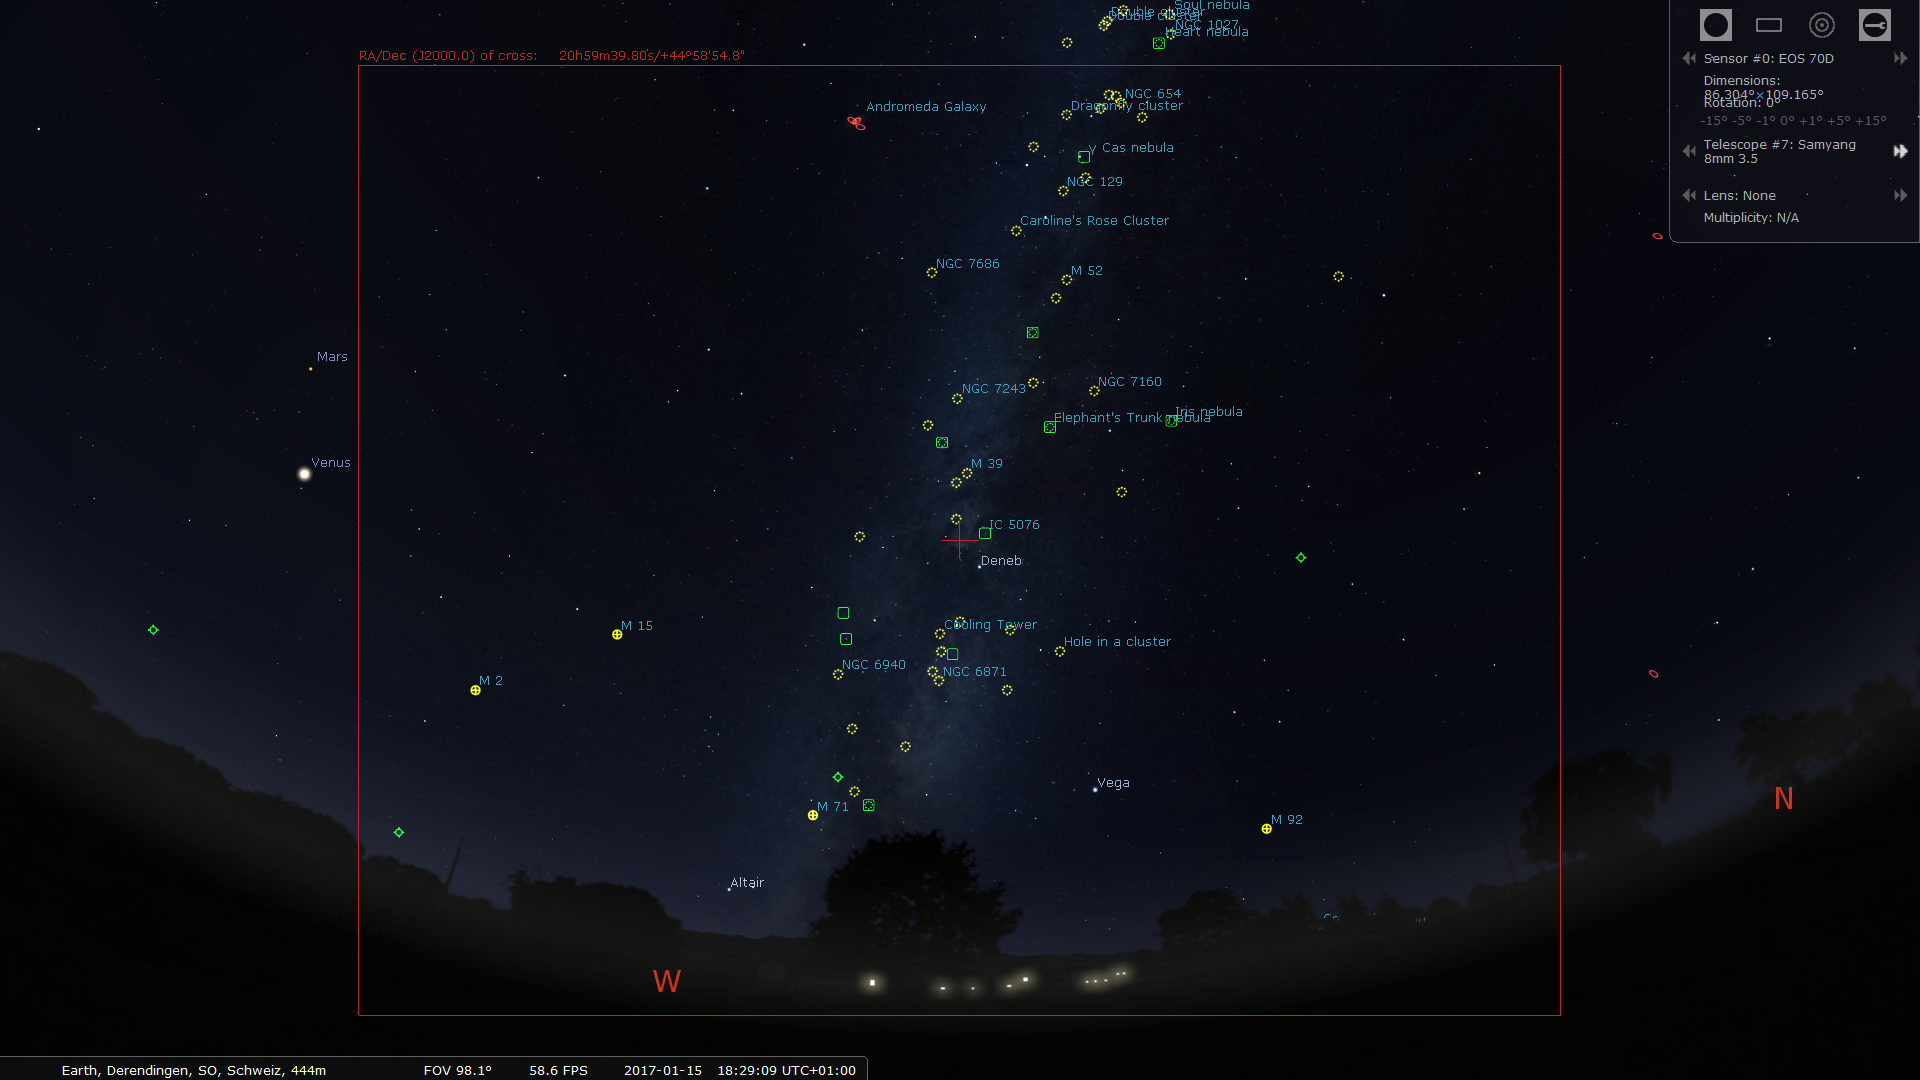
 Now you are able to simulate your photography sessions.
Select an object and click on the second icon in the top right icon box.
 To switch through your equipment simply click on the arrows next to it.
The field of view can be rotated by clicking on the rotation angles -15°, -5°, …, +5°, +15°
Examples


Read more how to find objects with the Star Adventurer and Stellarium. Locate DSO without Go-To.
Observing List / Favorites
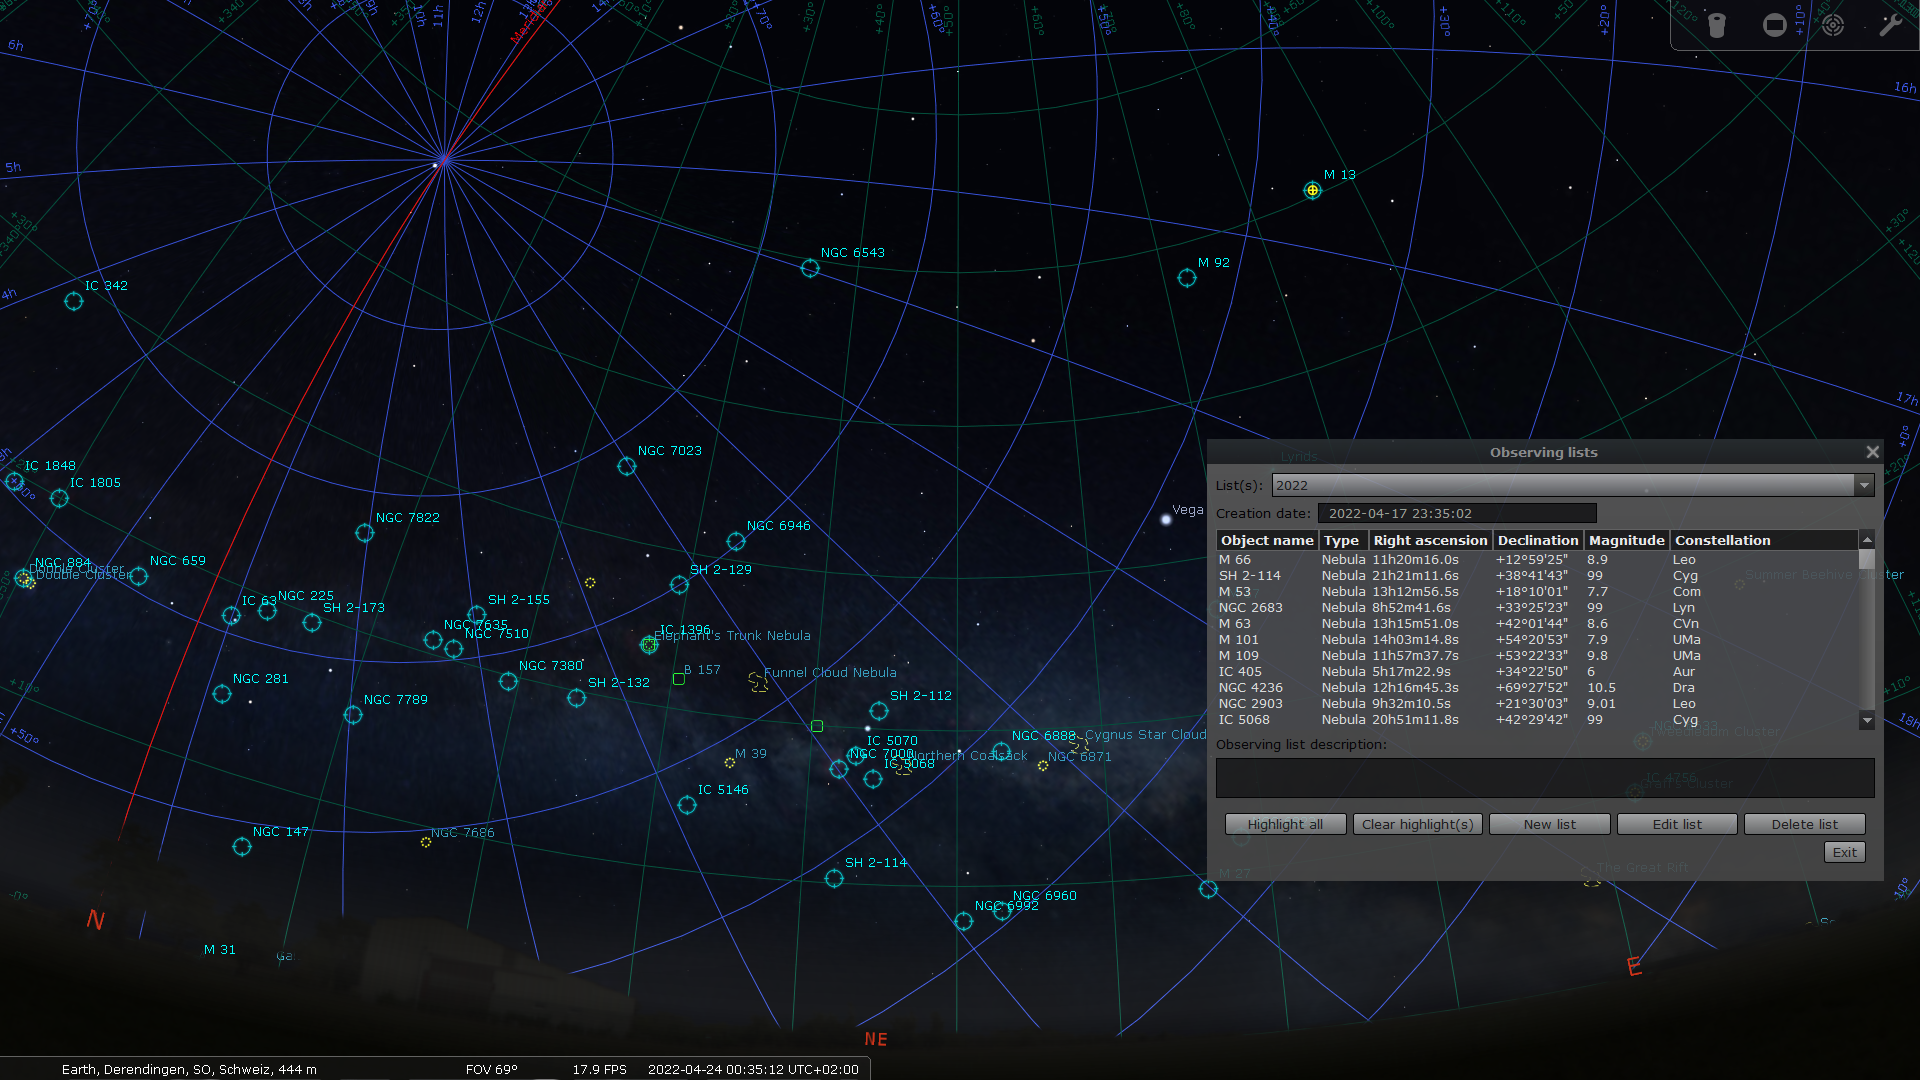
Press Alt + B to open the observing list and add your favorite deep sky objects. Once activated the highlighting, you see immediately all the objects highlighted in the sky, in any zoom level.
To backup your observing list(s), simply save the file observingList.json located in <YourUserFolder>\AppData\Roaming\Stellarium\data. Most probably you’ll have to enable view hidden files and folders in your Windows Explorer settings to unhide the AppData folder.
Solar System Exploration
Explore our solar system out of different angles. Select a planet or moon and press Ctrl + G and you’ll take a giant leap 😉
Note: it works only in our solar system!


5 comments
Hello
I’m a neophyte of astrophotography, I saw your video “Locate Deep Sky Objects with Star Adventurer and Stellarium” but I did not understand how do you search for celestial objects to photograph. can you explain step by step how to do it, or do you know a tutorial to show me?
In the video it seems that the star adventurer is connected live with the stellarium program but I do not think it’s possible.
Thank you
Hi. Yes, you’re right: it’s not possible to connect Stellarium in any way with the Star Adventurer. In the video I just want to show, how I conpare my test shots with Stellarium. Important is, that you configure your equipment in Stellarium. This way you can view your DSLR field-of-view in Stellarium. It helps to orientate in the sky.
To find an object, I simply start with a bright, good visible star near to my desired object. Then I move a little bit the RA axis of the Star Adventrer by pressing the arrow knobs on the side, take a testshot, compare it to stellarium to check how far away I’m from the object and so on and so on. Usually I need about 5-10 test shots to find the object.
On this page you can read more (scrol down): https://www.star-watcher.ch/equipment/locate-deep-sky-objects-with-star-adventurer/
Hope it helps 🙂
Clear Skies
Hi mate. Love the locate dso with goto vid.
But how do you overlay your test shot on stellerium?
Many thanks Marc
Hi Marc. Thanks. The overlay I did only for the video to visualize it. In the field I compare the test shots in Stellarium only by my eyes. I have all my equipment (lenses and DSLRs) configured in Stellarium to simulate the views. This makes it easier to find the right sky area. It would be cool if the test shots could be overlayed in Stellarium, but as far I know this is not possible. Hope it helps, otherwise feel free to ask again.
Clear Skies
Karol
hello, im fairly new to astrophotography. i use the star adventurer for now so locating dso can be a little tricky for me some times. im getting way better and ive learned a ton. hopefully one day theyll make the SA compatible with more of the different softwares. im planning on purchasing a good goto mount this coming year. but ill always find use for my SA. its an awesome little piece of equipment. i use APT and PHD2 and ive got stellarium but im just now trying to really incorporate it into my sessions. my reason for posting this is simply a thank you. you phrase things in a way that i actually understand. Its really appreciated